
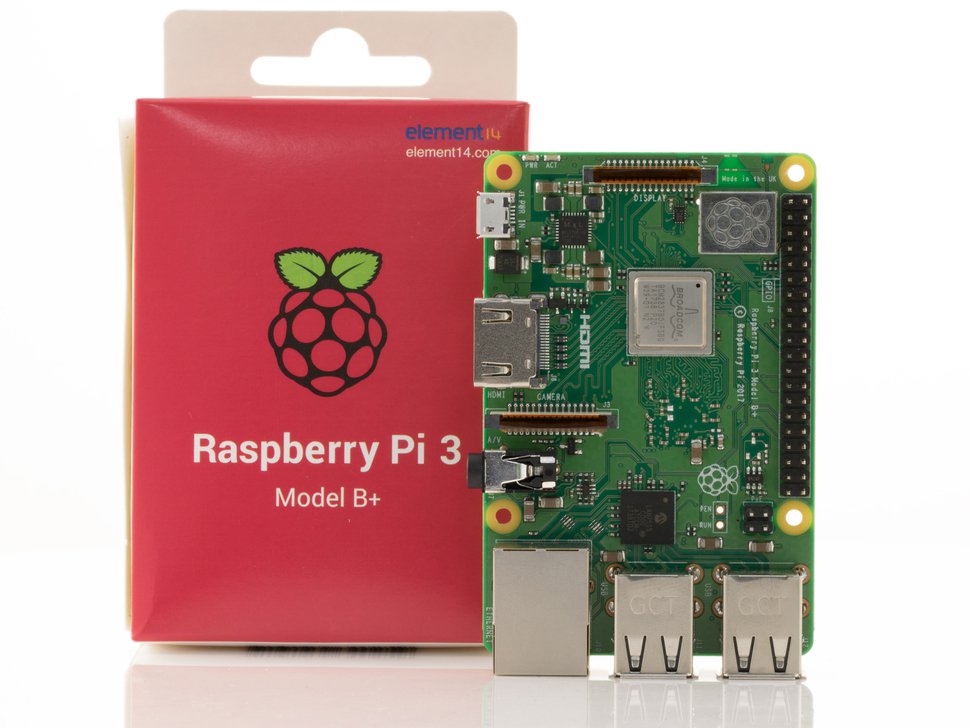
Raspberry Pi 3 Fastboot - Less Than 2 Seconds
Bu yazıyı Türkçe oku.|Read the post in Turkish.
This post tells about my journey of fast-booting a Raspberry Pi 3 (RPI). In addition to that, some optimizations are discussed that can be applied to a Qt (QML) application. In the end, we will have a RPI that boots from power-up to Linux shell in 1.75 seconds, power-up to Qt (QML) application in 2.82 seconds.
Edit : There are requests for a demo image that have a USB and network support. I’ll work on it in my free time. You can work on it by yourself. If you are stuck, don’t hesitate to ask a question from the support link below. I have briefly touched on the topic here.
Technical support : github.com/furkantokac/buildroot/issues
Project files : github.com/furkantokac/buildroot
Demo image : github.com/furkantokac/buildroot/releases
You can see the details of the demo image on part 6.
Outline
1. Introduction
2. Project Requirements
3. Raspberry Boot Files
4. Raspberry Boot Optimization
K1 - Raspberry boot stage
K2 - Linux pre-boot stage
K3 - Linux boot stage
K4 - Init system
K5 - Application
5. More Optimization!
6. In A Nutshell..
7. Result
8. References
1. Introduction
First of all, we should know the target device well since some critical stages of the boot optimization process are low-level (hardware dependent). We need to be able to answer questions such as what is the boot sequence of the device, which files are running in which order to boot the device, which files are 100% required etc. Besides that, optimizations should be done and tested one by one, so that the effect can be seen.
The boot process of RPI is kind of different from the other, traditional devices. RPI’s boot process is based on GPU rather than CPU. I recommend that you dig into more on this topic on the internet. (see 1, 9)
RPI uses Broadcom’s closed-source chip as System on Chip (SoC). Therefore, SoC-related softwares are provided to us as binary. (see 2) So we cannot customize them without reverse engineering. That is why the most difficult parts of the RPI boot optimization process are SoC-related ones.
2. Project Requirements
- RPI shall be used as a device.
- Buildroot shall be used for Linux customization.
- RPI’s GPIO, UART shall be usable.
- GPIO, UART shall be usable on Qt.
- Qt (QML) application shall automatically be started.
3. Raspberry Boot Files
The files related to RPI’s boot process and their purposes are briefly as the following;
- bootcode.bin: This is the 2nd Stage Bootloader, which is run by the 1st Stage Bootloader which is embedded into the RPI by the manufacturer. Runs on the GPU. Activates the RAM. Its purpose is to run start.elf (3rd Stage Bootloader).
- config.txt: Contains the GPU settings. Used by start.elf.
- cmdline.txt: Contains the Kernel parameters that will be passed to the Kernel when executing it. Used by start.elf.
- .dtb: The compiled Device Tree file. It contains hardware descriptions of the device, like GPIO pins, display ports, etc. It is used by start.elf and kernel.img.
- start.elf: This is the 3rd Stage Bootloader run by bootcode.bin. It contains the GPU driver. Its purpose is to split RAM between the GPU and the CPU, apply the settings inside the config.txt file to the GPU, make the necessary adjustments by reading the corresponding .dtb file, and run the kernel.img with the parameters in the cmdline.txt file. After performing these operations, it’ll keep running on the device as a GPU driver till the device is turned off.
- kernel.img: This is the Linux Kernel, run by start.elf. After Kernel runs, we have full control over everything.
- Basic logic: power-up the RPI -> embedded software inside RPI runs -> bootcode.bin runs -> start.elf runs -> read config.txt -> read .dtb -> read cmdline.txt -> kernel.img runs
4. Raspberry Boot Optimization
RPI boot process from power-up to Qt application is as the following;
K1 - Raspberry boot stage (1st & 2nd Stage Bootloader) (bootcode.bin)
K2 - Linux pre-boot stage (3rd Stage Bootloader) (start.elf, bcm2710-rpi-3-b.dtb)
K3 - Linux boot stage (kernel.img)
K4 - Init system (BusyBox)
K5 - Application (Qt QML)
K1 - Raspberry boot stage
In this part, the software embedded into the device by the manufacturer runs the bootcode.bin. Because bootcode.bin is closed-source, we can’t configure it directly so there are 2 things we can do. We either try different versions of the bootcode.bin files, or we try to change the files that are run by bootcode.bin. (we ignore the reverse-engineering)
We go to RPI’s GIT page (see 12) and see that there are no different versions of bootcode.bin available. We go to the old commits of bootcode.bin and try the old versions, we see that there is no change in speed. We can move on to the other option.
Let’s check for start.elf. On the RPI’s Git page, we see that there are different versions of start.elf files: start_cd.elf, start_db.elf, start_x.elf. We check the differences of the files and see that start_cd.elf is a simplified version of the start.elf. In the start_cd.elf, GPU features are cropped, this may cause a problem but let’s try it. When we change our start.elf by start_cd.elf, the boot process is 0.5sec faster than before. However, when we run the Qt app, it fails. So why it fails, can we fix it ? Our GUI application runs on OpenGL ES and start_cd.elf does not allocate enough memory for the GPU. Although we have tried to overcome this difficulty, we have not succeeded, but I believe that it can be solved if more time is spent on it.
K2 - Linux pre-boot stage
This part is handled by start.elf. Since start.elf is closed-source, we cannot directly work on it, but there are open-source files associated with start.elf: bcm2710-rpi-3-b.dtb, kernel.img
The first thing we can do is to check if any of these files slow down the start.elf. When we remove the Device Tree, Kernel does not boot. There are 2 possibilities here; the problem is either start.elf or Kernel. We need to find a way to test it. An application that can run without Device Tree will do the trick, which is a barebone RPI application. If we write a small application and let the start.elf run this application instead of Kernel, we can see that removing Device Tree creates any speed change. As a second option, we can compile U-Boot and run U-Boot instead of Kernel, but the first option is cool. We write a barenone LED blink application (see 13). When we run it, we see that removing the Device Tree makes the boot process faster for 1.0sec. We also try to change the default name of the Device Tree (bcm2710-rpi-3-b.dtb). It still works. So here is the conclusion: Device Tree is processed by start.elf even if we do not boot the Kernel, and start.elf specifically searches for the name “bcm2710-rpi-3-b.dtb”. To sum up, either we should get rid of the Device Tree or use it by changing its name.
Renaming the Device Tree option can be handled as the following; We can write a barebone software thats gonna be run by start.elf and handle the Kernel booting process by using renamed Device Tree. There will be time loss because we need to run an extra code here. Therefore, lets check the other option, which is cancelling the Device Tree.
We saw in our test that the Device Tree is absolutely necessary for booting the Kernel and not necessary for the start.elf. If the Device Tree is related to the Kernel, we can somehow try to hardcode the Device Tree configurations into the Kernel. When we search about Device Tree, we see that similar option already exists for the Kernel. (see 3 on page 11) When we make the necessary settings (K3 contains information about this setting), we see that the Kernel can boot successfully. Lets test if everything works OK.
After the tests, we observe that;
- Qt application works OK.
- UART stop working.
- We see that the boot time of the Kernel is slower by 0.7sec.
Lets check what is the problem with UART. We save the boot log of the Kernel where UART has problem and boot log of the Kernel where UART is running. (By boot log, I mean output of “dmesg” command). When we compare the logs, there is a difference in the line starting with “Kernel command line:”. In the system where UART is running, “8250.nr_uarts = 1” parameter is passed to the Kernel. We put this parameter into the cmdline.txt file of the problematic Kernel and it works like a charm. Lets move on the other problem.
We should check what slows down the boot process about 1.0sec. We will use the same logs again. When we compare the problematic system’s log and non-problematic system’s log, we see that there is an extra log in the problematic system that contains the word “random”, and the delay is there. When we try to close the “random” settings from the Kernel one by one, we find the problematic setting of the Kernel. (K3 has information about this setting) When we turn off the setting, we see that everything is back to normal. Mission completed.
As a result, boot process is faster about 2.0 seconds. The total time spent for K2 is 0.25sec. Our improvements can continue here, like we can optimize the Device Tree, but I think that we can spend time more efficiently by moving to the next step, so lets move.
K3 - Linux boot stage
We have explained some of the Kernel optimizations in part K2. This part has a list of Kernel features that we’ve played on. To see how a specific feature affects the Kernel booting process, please visit the Git page of the project (see 5) and, do detailed research online about the setting if it is required.
Enabled Features
ARM_APPENDED_DTB    : Embedding device tree for faster boot.
ARM_ATAG_DTB_COMPAT : Required to pass some parameters to kernel.
Disable Features
NET
SOUND
HW_RANDOM           # 0.7sn
ALLOW_DEV_COREDUMP  # 0.2sn (Core Release: 2.80a)
STRICT_KERNEL_RWX   #===\ 0.1sn
STRICT_MODULE_RWX   #===/
NAMESPACES          # 0.1sn
FTRACE              # 0.5sn

# Disable USB support
USB_SUPPORT

# Disable debugging
BLK_DEBUG_FS
DEBUG_BUGVERBOSE
DEBUG_FS
DEBUG_MEMORY_INIT
SLUB_DEBUG
PRINTK
BUG
DM_DELAY
ELF_CORE
KGDB
PRINT_QUOTA_WARNING
AUTOFS4_FS

# Followings are mostly affects the size
MEDIA_DIGITAL_TV_SUPPORT
MEDIA_ANALOG_TV_SUPPORT
MEDIA_CAMERA_SUPPORT
MEDIA_RADIO_SUPPORT
INPUT_MOUSEDEV
INPUT_JOYDEV
INPUT_JOYSTICK
INPUT_TABLET
INPUT_TOUCHSCREEN
IIO
RC_CORE
HID_LOGITECH
HID_MAGICMOUSE
HID_A4TECH
HID_ACRUX
HID_APPLE
HID_ASUS
K4 - Init system
InitSystem does not take a lot of time, but the fastest-running code is non-running code :) That’s why we have removed the BusyBox. The only process that is required for us from BusyBox is File System Mounting. We can simply embed this process into the application.
All we need to do is putting the following code anywhere in the Qt program:
QProcess::execute("/bin/mount -a");
Of course, this code should be put into the right place because this process may take time so we don’t want our application is being blocked by this process. After that, we put our application in “/sbin/” folder with the name “init” and the process is completed. Kernel automatically runs the “/sbin/init” after it loads the userspace so the first thing that runs after userspace is loaded will be our application.
K5 - Application
Qt Creator offers detailed debugging tools. Using these tools, we can determine what is slowing down of Qt application starting process.
Static Compilation
One of the biggest improvements we have done in K5 is static compilation. Static compilation means that all the libraries required by the application are stored in its binary file. (see 6, 7) When we compile a Qt application by default settings, the application is compiled dynamically. In dynamic compilation, the application calls the required libraries one by one from the file system and this is a waste of time. Static compilation has no disadvantage in our scenario so it is safe to use. This has allowed us to gain approximately 0.33sec.
Stripping
Stripping reduces the file size by stripping unnecessary areas of the binary file. It is a very useful and essential step, especially after static compilation. Stripping can be done with the following command: strip --strip-all QtApp After this process, the application size of 21mb decreased to 15mb.
QML Lazy Load
This feature does not make a big impact in our case because the GUI of the application we are working on is not very complex, but in large QML files, we can hide our time-taking processes by showing the user some graphical contents like an animation.
Embedding Source Files in the Application
Any resources that we add to the project through the .qrc file are embedded in the compiled program. This feature should be default after Qt 9.0. Just try to keep everything in the binary file (like fonts, images, etc.) by using this feature.
5. More Optimization!
Although there are infinitely different possibilities in this section, we discuss the ones that will have a big impact in an acceptable amount of time. Besides that, there are some bits of advice.
Code: G1
Related section: K1 (start.elf)
Estimated effect: 0.5sec
Available Tools / Methods: ARM disassembler
Description: start_cd.elf can be used instead of start.elf. To do this, it is necessary to reverse engineer the start_cd.elf file to identify the problem. We first need to understand the structure of start.elf. Then we can hack start_cd.elf to solve the problem.
Code: G2
Related section: K5 (Qt)
Estimated effect: 0.9sec
Available Tools / Methods: Cache
Description: When a userspace application runs for the first time, it starts slow since it is not cached. After they are cached by the Kernel, they start much faster. (see 8) The same situation is observed in our Qt application. The difference can be observed by running the Qt application, then close and re-run it. If we can somehow copy the cache and pass it to the Kernel at boot time, our application will start faster. The source code “hibernate.c” (see 10) and “drop_caches.c” (see 11) inside the Kernel can be used for this purpose.
Code: G3
Related section: K3 (kernel.img), K5 (Qt)
Estimated effect: 1.0sec
Available Tools / Methods: Hibernate
Description: By hibernate, we can have a major gain for the K3 and K5 stages. To implement hibernate, we need a full-control on it since it may cause an unstable system if it is not implemented correctly.
Code: G4
Related section: K3 (kernel.img), K5 (Qt)
Estimated effect: -
Available Tools / Methods: initramfs, SquashFS
Description: There are 2 partitions on the SD card: Boot Partition and File System Partition (rootfs). Boot Partition contains the files necessary for Raspberry to boot. For this reason, Boot Partition is automatically read by Raspberry. The Kernel runs on the RAM without a File System at first. So if we put the whole rootfs in Kernel.img, all the operations after copying Kernel.img to RAM will be faster because it will be on the RAM. This will increase the size of Kernel.img, so the size of Kernel.img should be reduced as much as possible.
Code: G5
Related section: K3 (kernel.img), K5 (Qt)
Estimated effect: -
Available Tools / Methods: Btrfs, f2fs
Description: These File System types have high read-speed, while they support both reading and writing. For fast-boot, read-speed is more important than write-speed. So these File Systems are worth a try.
Code: G100
Description: Debugging, which is the fundamental part of the optimization process, needs to be planned in detail. Before starting the optimization process, you should not hesitate to share time for a debugging plan, collect the necessary materials for debugging, automate the development/debugging processes.
Code: G101
Description: We have started the optimizations from the lowest level, that is, from Raspberry’s self-boot to the highest level, that is, the optimization of the Qt application. This makes debugging difficult. Instead, I think that starting from the highest level may make debugging easier.
6. In A Nutshell..
If you want to just have a fast-boot image for your RPI without going into the details, follow these steps;
git clone https://github.com/furkantokac/buildrootcd buildrootmake ftdev_rpi3_fastboot_defconfigmake- At this stage, the ready-to-run RPI image will be available in the
buildroot/output/imagesfolder. You can write it to the SD device and boot RPI directly. When the system is up, the terminal should be displayed directly on the screen.
The image you gonna have has no overclock so you can faster the booting process by overclocking your RPI. Also, you can compile your own Qt application statically and replace it with sbin/init to run it on startup. USB drivers are removed so you can not control the RPI by a USB keyboard or mouse.
7. Result
“Normal” section has the measurements of the default Buildroot image. Only the boot delay time is reduced to 0.
“ftDev” section has the measurements of the optimized image.
| K1 | K2 | K3 | K4 | K5 | Toplam | |
|---|---|---|---|---|---|---|
| Normal | 1.25sn | 2.12sn | 5.12sn | 0.12sn | 1.56sn | 10.17sn |
| ftDev | 1.25sn | 0.25sn | 0.25sn | 0.00sn | 1.07sn | 2.82sn |
Note: Measurements are done by recording the boot process with a high-speed camera. Therefore, they are accurate.
8. References
1. How the Raspberry Pi boots up
2. Raspberry / Firmware
3. Device Tree For Dummies
4. Mergely : Compare 2 Texts
5. ftDev / Buildroot Kernel Doc
6. RaspberryPi2EGLFS
7. Linking to Static Builds of Qt
8. Linux System Administrators Guide / Memory Management / The buffer cache
9. Raspberry Pi Boot
10. Raspberry / Linux / kernel / power / hibernate.c
11. Raspberry / Linux / Bootp
12. Raspberry / Firmware / Boot
13. ftDev / Raspberry Pi 3 Baremetal
14. ftDev / RPI3 Demo Image
15. ftDev / Buildroot
16. BMS Demo Video
17. ftDev / Releases
18. ftDev / Issues